Tag Archives: ubuntu

Ubuntu – Fix “No Video Signal” Issue on Emu

An issue with Emu cropped up a few weeks ago that was seemingly caused by upgrading from Ubuntu 16.04 to 18.04.

However, the problems only seemed related to using Emu via the GUI; users could still use Emu as a headless computer via SSH.

Today, I was upgrading some packages and noticed two things:

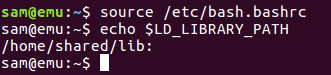
  1. When initially logging in to Emu.
    
    sam@swoose:~$ ssh emu
    Welcome to Ubuntu 16.04.5 LTS (GNU/Linux 4.4.0-57-generic x86_64)
    
    * Documentation:  https://help.ubuntu.com
    * Management:     https://landscape.canonical.com
    * Support:        https://ubuntu.com/advantage
    
    0 packages can be updated.
    0 updates are security updates.
    
    New release '18.04.1 LTS' available.
    Run 'do-release-upgrade' to upgrade to it.
    
    You have mail.
    Last login: Tue Oct  2 07:30:32 2018 from 128.95.149.75
    

    This is showing that Emu is still running Ubuntu 16.04, not 18.04 as presumed!

  2. An error in the GRUB config generation process when upgrading packages.


run-parts: executing /etc/kernel/postrm.d/zz-update-grub 4.4.0-134-generic /boot/vmlinuz-4.4.0-134-generic
Generating grub configuration file ...
Found linux image: /boot/vmlinuz-4.4.0-137-generic
Found initrd image: /boot/initrd.img-4.4.0-137-generic
Found linux image: /boot/vmlinuz-4.4.0-135-generic
Found initrd image: /boot/initrd.img-4.4.0-135-generic
Found linux image: /boot/vmlinuz-4.4.0-57-generic
Found initrd image: /boot/initrd.img-4.4.0-57-generic
Found linux image: /boot/vmlinuz-4.4.0-53-generic
Found initrd image: /boot/initrd.img-4.4.0-53-generic
error: syntax error.
error: Incorrect command.
error: syntax error.
Syntax error at line 98
Syntax errors are detected in generated GRUB config file.
Ensure that there are no errors in /etc/default/grub
and /etc/grub.d/* files or please file a bug report with
/boot/grub/grub.cfg.new file attached.
done
Processing triggers for libc-bin (2.23-0ubuntu10) ...

These two bits of information led me to believe the problem wasn’t that the system upgrade to 18.04 was incompatible with these old Apple Xserve hardware (since the upgrade didn’t actually get implemented) and instead was that the upgrade might have been initiated, but aborted, which modified the GRUB configuration file(s), breaking the GUI; much like the problem I previously addressed earlier this summer.

When I fixed the display/GUI issues with Emu and Roadrunner earlier this summer, I noted that the /etc/default/grub files on each of the computers were slightly different, despite the fact that these two computers should be identical. So, I replaced the /etc/default/grub file on Emu with the file from Roadrunner and rebooted Emu.

Contents of /etc/default/grub file on Emu/Roadrunner, for future reference:


# If you change this file, run 'update-grub' afterwards to update
# /boot/grub/grub.cfg.
# For full documentation of the options in this file, see:
#   info -f grub -n 'Simple configuration'

GRUB_DEFAULT=0
#GRUB_HIDDEN_TIMEOUT=0
GRUB_HIDDEN_TIMEOUT_QUIET=true
GRUB_TIMEOUT=10
GRUB_DISTRIBUTOR=`lsb_release -i -s 2> /dev/null || echo Debian`
GRUB_CMDLINE_LINUX_DEFAULT="quiet splash"
GRUB_CMDLINE_LINUX=""

# Uncomment to enable BadRAM filtering, modify to suit your needs
# This works with Linux (no patch required) and with any kernel that obtains
# the memory map information from GRUB (GNU Mach, kernel of FreeBSD ...)
#GRUB_BADRAM="0x01234567,0xfefefefe,0x89abcdef,0xefefefef"

# Uncomment to disable graphical terminal (grub-pc only)
#GRUB_TERMINAL=console

# The resolution used on graphical terminal
# note that you can use only modes which your graphic card supports via VBE
# you can see them in real GRUB with the command `vbeinfo'
#GRUB_GFXMODE=640x480

# Uncomment if you don't want GRUB to pass "root=UUID=xxx" parameter to Linux
#GRUB_DISABLE_LINUX_UUID=true

# Uncomment to disable generation of recovery mode menu entries
#GRUB_DISABLE_RECOVERY="true"

# Uncomment to get a beep at grub start
#GRUB_INIT_TUNE="480 440 1"

Voila! Emu now has a functional display/GUI again!

Ubuntu – Fix “No Video Signal” Issue on Emu/Roadrunner

Both Apple Xserves (Emu/Roadrunner) running Ubuntu (16.04LTS) experienced the same issue – the monitor would indicate “No Video Signal”, would go dark, and wasn’t responsive to keyboard/mouse movements. However, you could ssh into both machines w/o issue.

Although having these machines be “headless” (i.e. with no display) is usually fine, it’s not ideal for a couple of reasons:

  1. Difficult to use for other lab members who aren’t as familiar with SSH – specifically if they would want to use a Jupyter Notebook remotely (this would require setting up a tunnel to their own computer).

  2. Can’t use Remmina Remote Desktop until a user has physically logged in from the Ubuntu login screen at least once, in order to launch Remmina.

The second aspect was the major impetus in me finally being motivated to deal with this. Accessing these computers via remote desktop is much easier to manage long-running Jupyter Notebooks instead of relying on an SSH tunnel. The tunnel greatly limits my access to the Jupyter Notebook outside of the computer that has the tunnel set up.

Well, this led me down a horrible rabbit hole of Linux stuff that I won’t get fully in to (particularly, since I didn’t understand most of it and can’t remember all the crazy stuff I read/tried).

However, here’s the gist:

  1. Needed to edit /etc/default/grub

  2. After editing, needed to update grub config file: sudo update-grub

Despite the fact that both machines are (or, should be) identical, I did not get the same results. The edits I made to the /etc/default/grub file on Emu worked immediately. The edits were:

  1. Add nomodeset to this (this is the edited line) line (this seemed to be the most common suggestion for fixing the “No Video Signal” issue):

GRUB_CMDLINE_LINUX_DEFAULT="quiet splash nomodeset"

  1. Comment out this line (this line was triggering an error/warning about writing the config file when running the update-grub command):

#GRUB_HIDDEN_TIMEOUT=0

For some reason, Roadrunner did not take kindly to those changes and it took a long time to resolve, ending with changing permissions on ~/.Xauthority back to their original permissions (they got altered when I ran some command – sudo startx or something) to get out of a login loop.

Regardless, both are fixed, both can be used when physically sitting at the computer, and both can be accessed remotely using Remmina!

Ubuntu Installation – Convert Apple Xserve “bigfish” to Ubuntu

Due to hardware limitations on the Apple Xserves we have, we can’t use drives >2TB in size. “Bigfish” was set up to be RAID’d and, as such, has three existing HDDs installed.

We wanted to upgrade the HDD size and convert over to Linux (Ubuntu) so that we could utilize the Linux operating system for some of our bioinformatics programs that won’t run on OSX.

I installed Ubuntu 16.04LTS to the SSD boot drive (128GB) and installed three, 2TB HDDs. However, it cannot detect the HDDs due to the Apple hardware RAID controller! Searching the internet has revealed that this is a commonly encountered issue with RAID’d Apple Xserves and Linux installs.

I haven’t come across a means by which to remedy this. Will likely have to install an OS X version in order to make this computer usable. Although, that won’t limit us too terribly in regards to program usage. Most programs will run fine on OSX.

Software Install – MSMTP For Email Notices of Bash Job Completion on Emu (Ubuntu)

After I finally resolved the installation of PB Jelly on Emu (running Ubuntu 16.04), I’ve had a PB Jelly assembly running for the past two weeks! I’ve gotten tired of checking on its status (i.e. is it still running?) every day, so I dove in and figured out how to set up Emu to email me when the job is complete!

To get this going, I mainly followed this msmtp ArchWiki guide., but here are the specifics of how I set it up.

Step 1. Installed a mail server:

sudo apt-get install sendmail

Step 2. Installed msmtp:

sudo apt-get install msmtp

Step 3. Created the following file in my home directory (/home/sam/): ~/.msmtprc

The original contents of the file for testing were:

       # Example for a user configuration file ~/.msmtprc
       #
       # This file focuses on TLS and authentication. Features not used here include
       # logging, timeouts, SOCKS proxies, TLS parameters, Delivery Status Notification
       # (DSN) settings, and more.

       # Set default values for all following accounts.
       defaults

       # Use the mail submission port 587 instead of the SMTP port 25.
       port 587

       # Always use STARTTLS.
       tls on
       tls_starttls on
       tls_certcheck off
       # A freemail service
       account uw

       # Host name of the SMTP server
       host smtp.washington.edu

       # Envelope-from address
       from emu@uw.edu

       # Authentication. The password is given using one of five methods, see below.
       auth on
       user samwhite

       # Password method 3: Store the password directly in this file. Usually it is not
       # a good idea to store passwords in plain text files. If you do it anyway, at
       # least make sure that this file can only be read by yourself.
       password myuwpassword

       account default : uw

This is a configuration to allow emails to get sent via the Univ. of Washington email servers. Yes, I currently had UW password saved in this file, but will be addressing this issue below.

Step 4. Changed permissions on ~/.msmtprc to be readable/writable only by me (important, particularly if you’ve stored your password in this file!):

chmod 600 ~/.msmtprc

Step 5. Assigned sendmail to use msmtp with the set command (this sets the following command as a positional parameter by adding to the /etc/mail.rc file:

echo "set sendmail=/usr/bin/msmtp" | sudo tee -a /etc/mail.rc

This command pipers the output of echo to sudo and uses tee -a to append to our desired file (/etc/mail.rc).

Step 5. Send a test email:

echo "Job complete!" | msmtp myuwemail@uw.edu

That will send an email with no subject and the body of the email will contain “Job complete!”.

That’s the basic set up for this.

To use it in your workflow, you’d append that command to the end of any Bash command or in a separate Jupyter notebook cell that is queued to run after a previous cell completes it’s job.

Example:

echo "This counts as a command"; echo "Job complete!" | msmtp myuwemail@uw.edu

This will run the first echo command. When that finishes, then the email command will run. You can get fancy and have different emails in response to how the running program exits (i.e. fails or is successful) and send different email responses, but I’m not going to get into that.

Anyway, not bad! However, we want to make this a bit nicer and more secure.


Improve security:

Step 1. Generate a GPG Key:

Follow the instructions under the Creating an Encryption Key section at this link.

DO NOT CREATE A PASSWORD! JUST HIT ENTER WHEN AT THAT STEP.

Technically, this is does not follow proper security protocols, but this is better than having a plain text password, and setting it up this way is the only way the mail program will send without prompting the user for a password (which kills the automation we’re trying to achieve).

Step 2. Create an encrypted password file:

gpg --encrypt -o ~/.msmtp-password.gpg -r youremailaddress -

After entering that, type your UW email password(NOTE: You will not receive a new prompt, so just type it in), and then Enter. Then, press Ctrl-d.

Step 3. Add the following line to your ~/.msmtprc file:

passwordeval    "gpg --quiet --for-your-eyes-only --no-tty --decrypt ~/.msmtp-password.gpg"

Here’s what the file looks like now:

       # Example for a user configuration file ~/.msmtprc
       #
       # This file focuses on TLS and authentication. Features not used here include
       # logging, timeouts, SOCKS proxies, TLS parameters, Delivery Status Notification
       # (DSN) settings, and more.

       # Set default values for all following accounts.
       defaults

       # Use the mail submission port 587 instead of the SMTP port 25.
       port 587

       # Always use STARTTLS.
       tls on
       tls_starttls on
       tls_certcheck off

       # Email account nickname
       account uw

       # Host name of the SMTP server
       host smtp.washington.edu

       # Envelope-from address
       from emu@uw.edu

       # Authentication. The password is given using one of five methods, see below.
       auth on
       user samwhite


       # Password method 2: Store the password in an encrypted file, and tell msmtp
       # which command to use to decrypt it. This is usually used with GnuPG, as in
       # this example. Usually gpg-agent will ask once for the decryption password.
       passwordeval    "gpg --quiet --for-your-eyes-only --no-tty --decrypt ~/.msmtp-password.gpg"

       account default : uw

Step 4. Change permissions on ~/.msmtp-password.gpg so it’s only readable/writable by you:

chmod 600 ~/.msmtp-password.gpg

Step 5. Send a test email like before:

echo "Job complete!" | msmtp myuwemail@uw.edu

That’s it for security.


Add a subject to the emails:

Step 1. Create ~/.default_subject.mail and add the following lines to the file (substitute your own email address):

To: myuwemail@uw.edu
From: [EMU]
Subject: JOB COMPLETE!

Feel free to change the Subject and/or From info to whatever you’d like.

Step 2. Send message using ~/.default_subject.mail:

cat ~/.default_subject.mail | msmtp myuwemail@uw.edu

To use this in your workflow, you’ll do just like before (but using the command immediately above) and append to the end of any Bash command.


Make it short & sweet

Appending those lines is going to be difficult to remember, is annoying to type out, and displays your email address (particularly if using a publicly hosted Jupyter notebook like most of us in lab do). Here’s a nice way to remedy that.

Step 1. Add email address as variable in ~/.bashrc:

Add the following lines to the end of your ~/.bashrc file:

# Email address
export EMAIL=myuwemail@uw.edu

Your email address is now saved in the variable $EMAIL. You will need to use the following command to load that information:

source ~/.bashrc

Verify that it worked:

echo "$EMAIL"

That should spit out your email address and is ready to be used!

Step 2. Add alias for full mail command to ~/.bash_aliases file:

echo "alias emailme='cat ~/.default_subject.mail | msmtp "$EMAIL"'" >> ~/.bash_aliases

Verify that it worked:

source ~/.bash_aliases
emailme

So, from now on, all you have to do is append the command emailme to the end of any Bash commands and you’ll get email when the job is finished!!! You can edit Steps 1 & 2 to use a variable other than “EMAIL” and an alias other than “emailme” – use whatever you’d like.

Troubleshooting – PB Jelly Install on Emu Continued

The last “fix” didn’t fix everything.

This time, I received an error message that was related to blasr. Some internet searching revealed that I needed to have various library files saved to a variable named: $LD_LIBRARY_PATH

To fix this, I added the following line to the /etc/bash.bashrc file:

export "LD_LIBRARY_PATH=${LD_LIBRARY_PATH:+${LD_LIBRARY_PATH}:}/home/shared/lib:"

The line uses a fancy bash test to determine if the $LD_LIBRARY_PATH variable already exists. This is to prevent the $LD_LIBRARY_PATH from having a leading ":".

As usual, the solution to that problem was found courtesy of StackExchange (#162891).

Also, by putting this line in the /etc/bash.bashrc file, it makes the variable available for all users.

Below are some screen caps to document the process:

Realization that PB Jelly still wasn't going to work:

Identify location of file listed in error message:

Add command to /etc/bash.bashrc to set $LD_LIBRARY_PATH:

Verify $LD_LIBRARY_PATH:

Verify blasr can run: