MBD Enrichment – Crassostrea virginica Sheared DNA Day 3

Continued MBD enrichment of C.virginica DNA from yesterday for Qiagen project.

Followed the MethylMiner Methylated DNA Enrichment Kit (Invitrogen) manufacturer’s protocol for input DNA amounts of 1 -10ug (I am using 8ug in each of two samples).

Since the protocol has two elution steps that are each saved separately from each other for each sample, I did the following to combine the two elution fractions into a single sample:

  • Pelleted one elution fraction from each sample
  • Discarded supernatant from pelleted sample
  • Transferred second elution fraction to the pellet from the first elution fraction
  • Pelleted second elution fraction

The rest of the ethanol precipitation procedure was followed per the manufacturer’s protocol.

Final pellets were resuspended in 25μL of Buffer EB (Qiagen) and stored temporarily on ice for quantification.

MBD Enrichment – Crassostrea virginica Sheared DNA Day 2

Continued MBD enrichment for C.virginica and Qiagen project from yesterday.

Followed the MethylMiner Methylated DNA Enrichment Kit (Invitrogen) manufacturer’s protocol for input DNA amounts of 1 -10ug (I am using 8ug in each of two samples).

Performed a single, high-salt elution.

Samples were precipitated O/N @ -80C.

MBD Enrichment – Crassostrea virginica Sheared DNA Day 1

As part of a project with Qiagen to have them try out some of our DNA with their newest DNA bisulfite conversion kit, I previously isolated DNA from Crassotrea virginica (Eastern oyster) and sheared to ~420bp.

Next, I needed to enrich the samples for methylated DNA. Did this using the MethylMiner Methylated DNA Enrichment Kit (Invitrogen). Followed the manufacturer’s protocol for input DNA amounts of 1 -10ug (I am using 8ug in each of two samples). Below are the exact volumes used for various steps:

Made 1x Bind/Wash Buffer

  • 2.88mL 5x Bind/Wash Buffer

  • 720uL molecular biology grade H2O

Beads:

  • 80uL beads per sample

MBD-biotion protein:

  • 56uL per sample

Diluted the two sheared DNA samples to 25ng/uL:

  • CiVi = CfVf

  • (58.4ng/uL)(136uL) = (25ng/uL)(Vf)

  • Vf = 317.7

  • Add 181.7uL H2O to DNA to get 317.7ul (i.e. 25ng/uL)

Samples were incubated O/N in the 4C in the rotator.

Tissue Sampling – Crassostrea virginica Tissues for Archiving

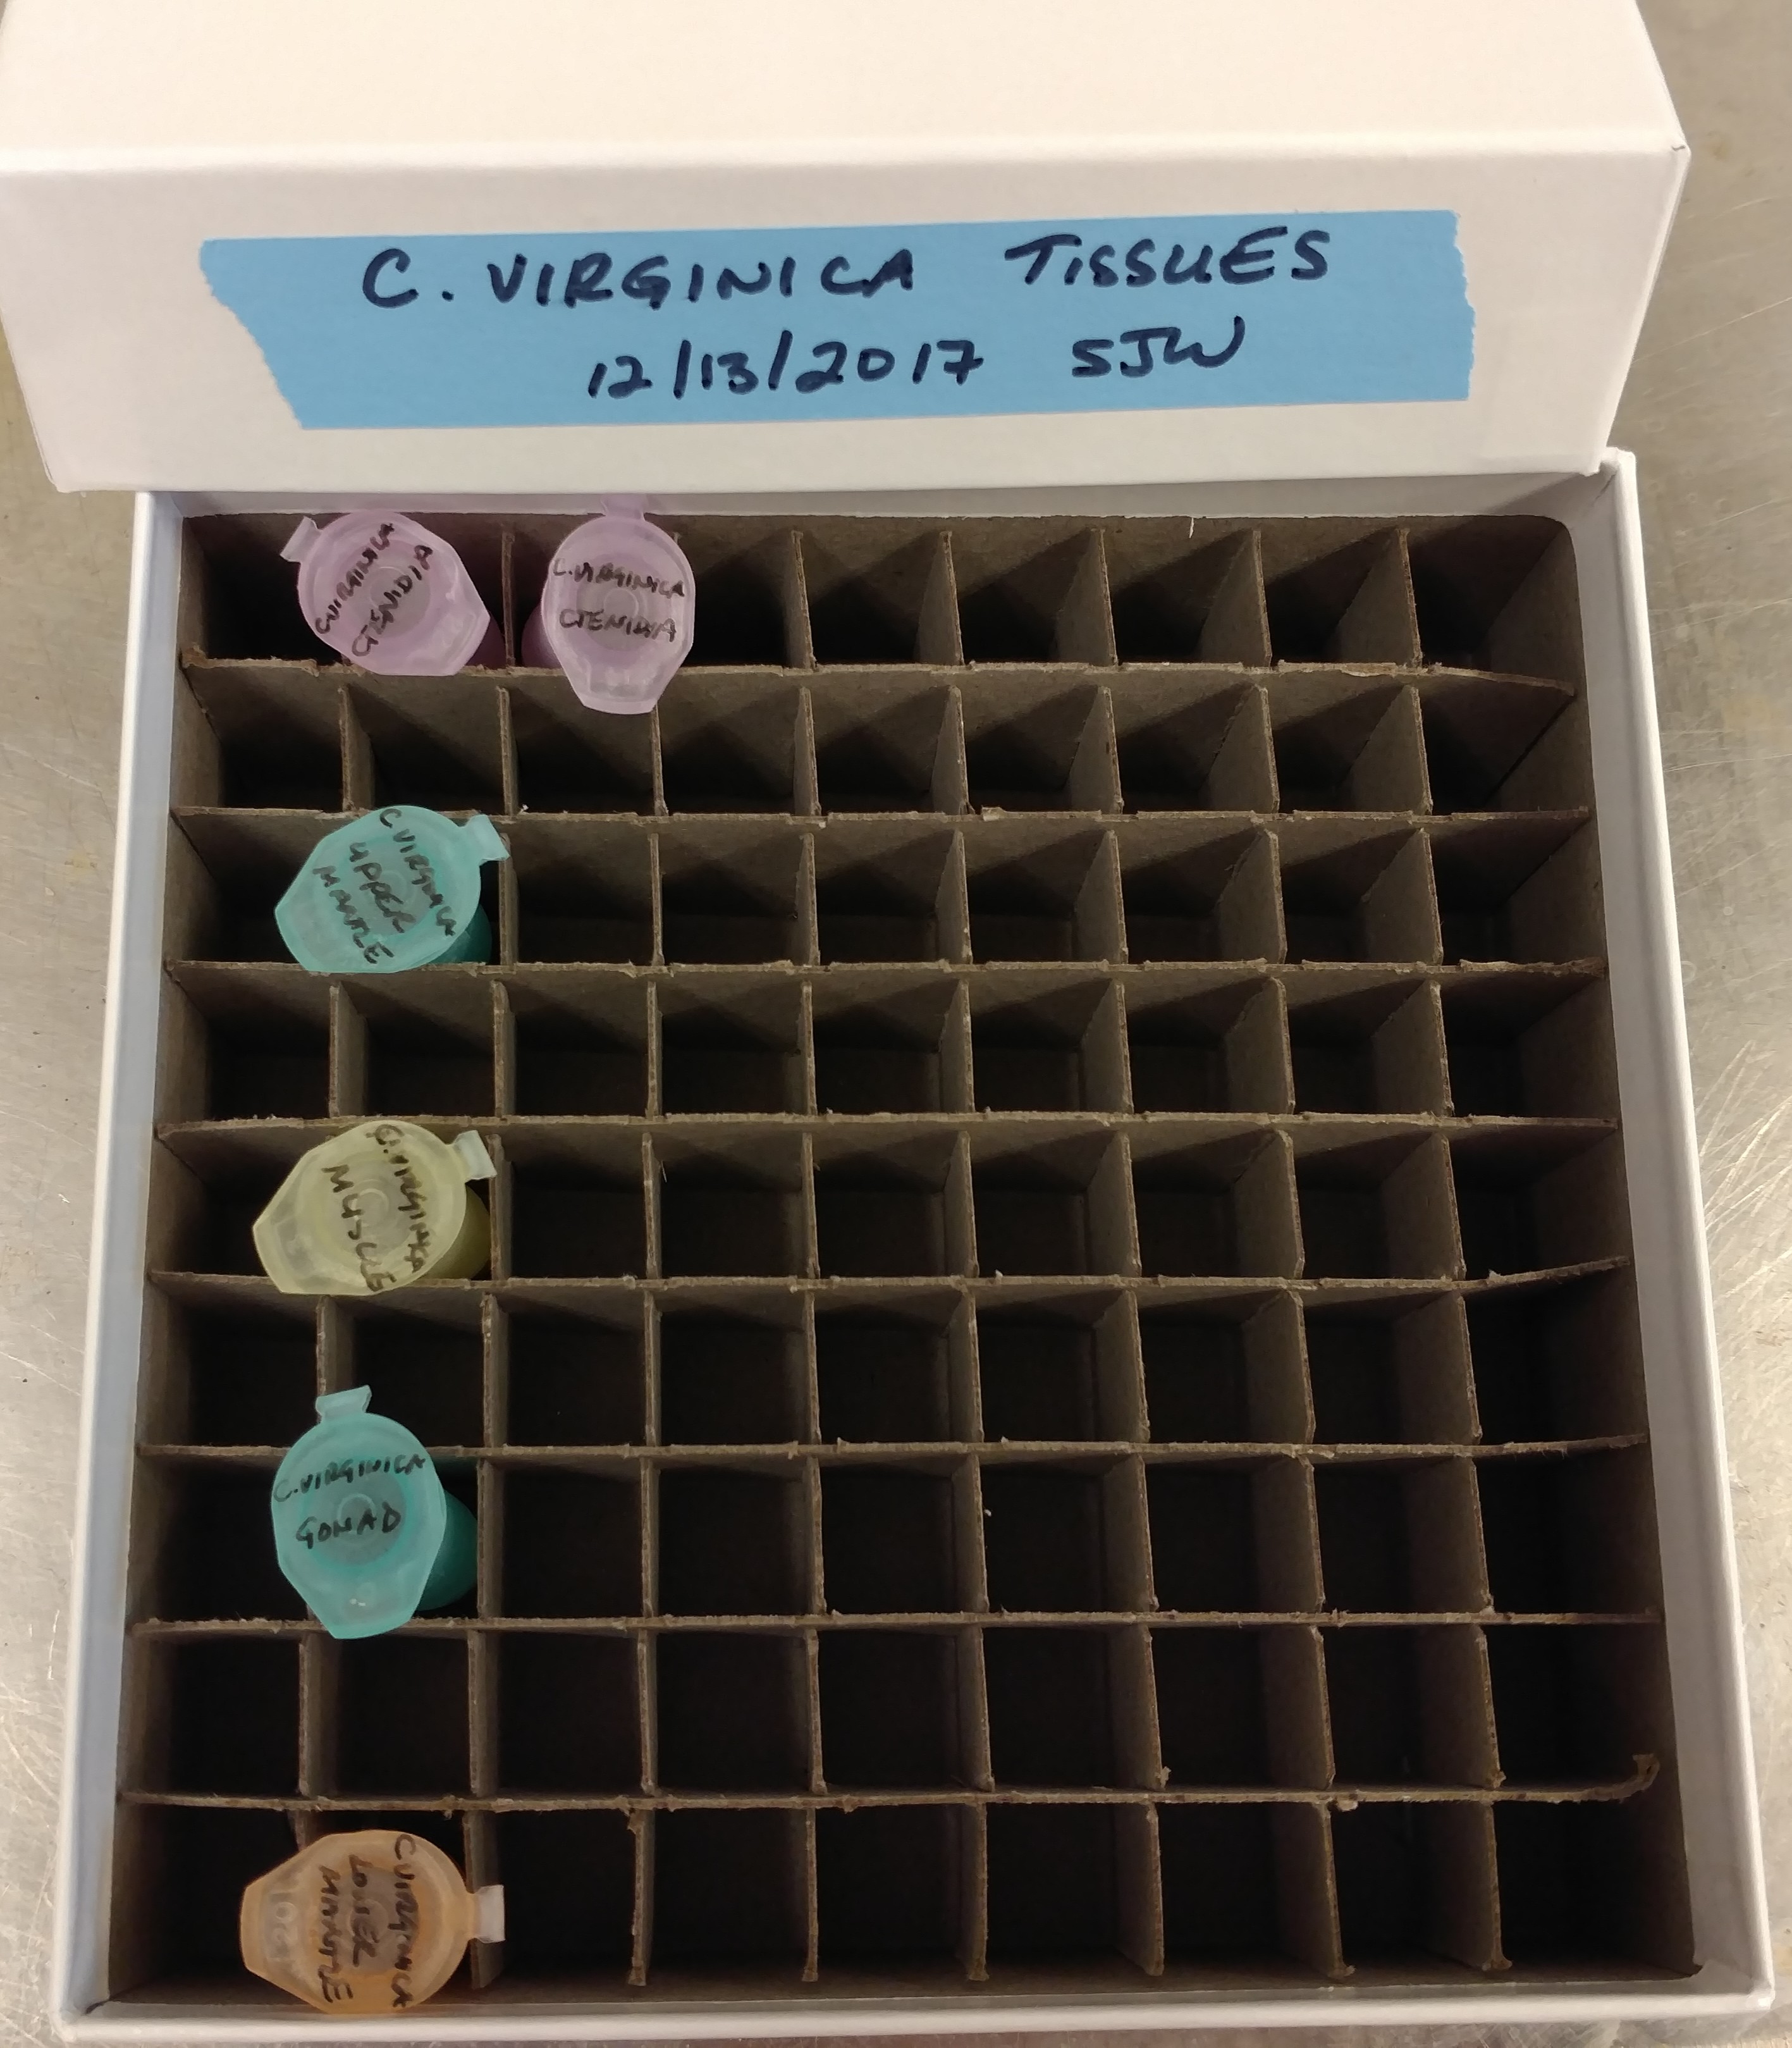
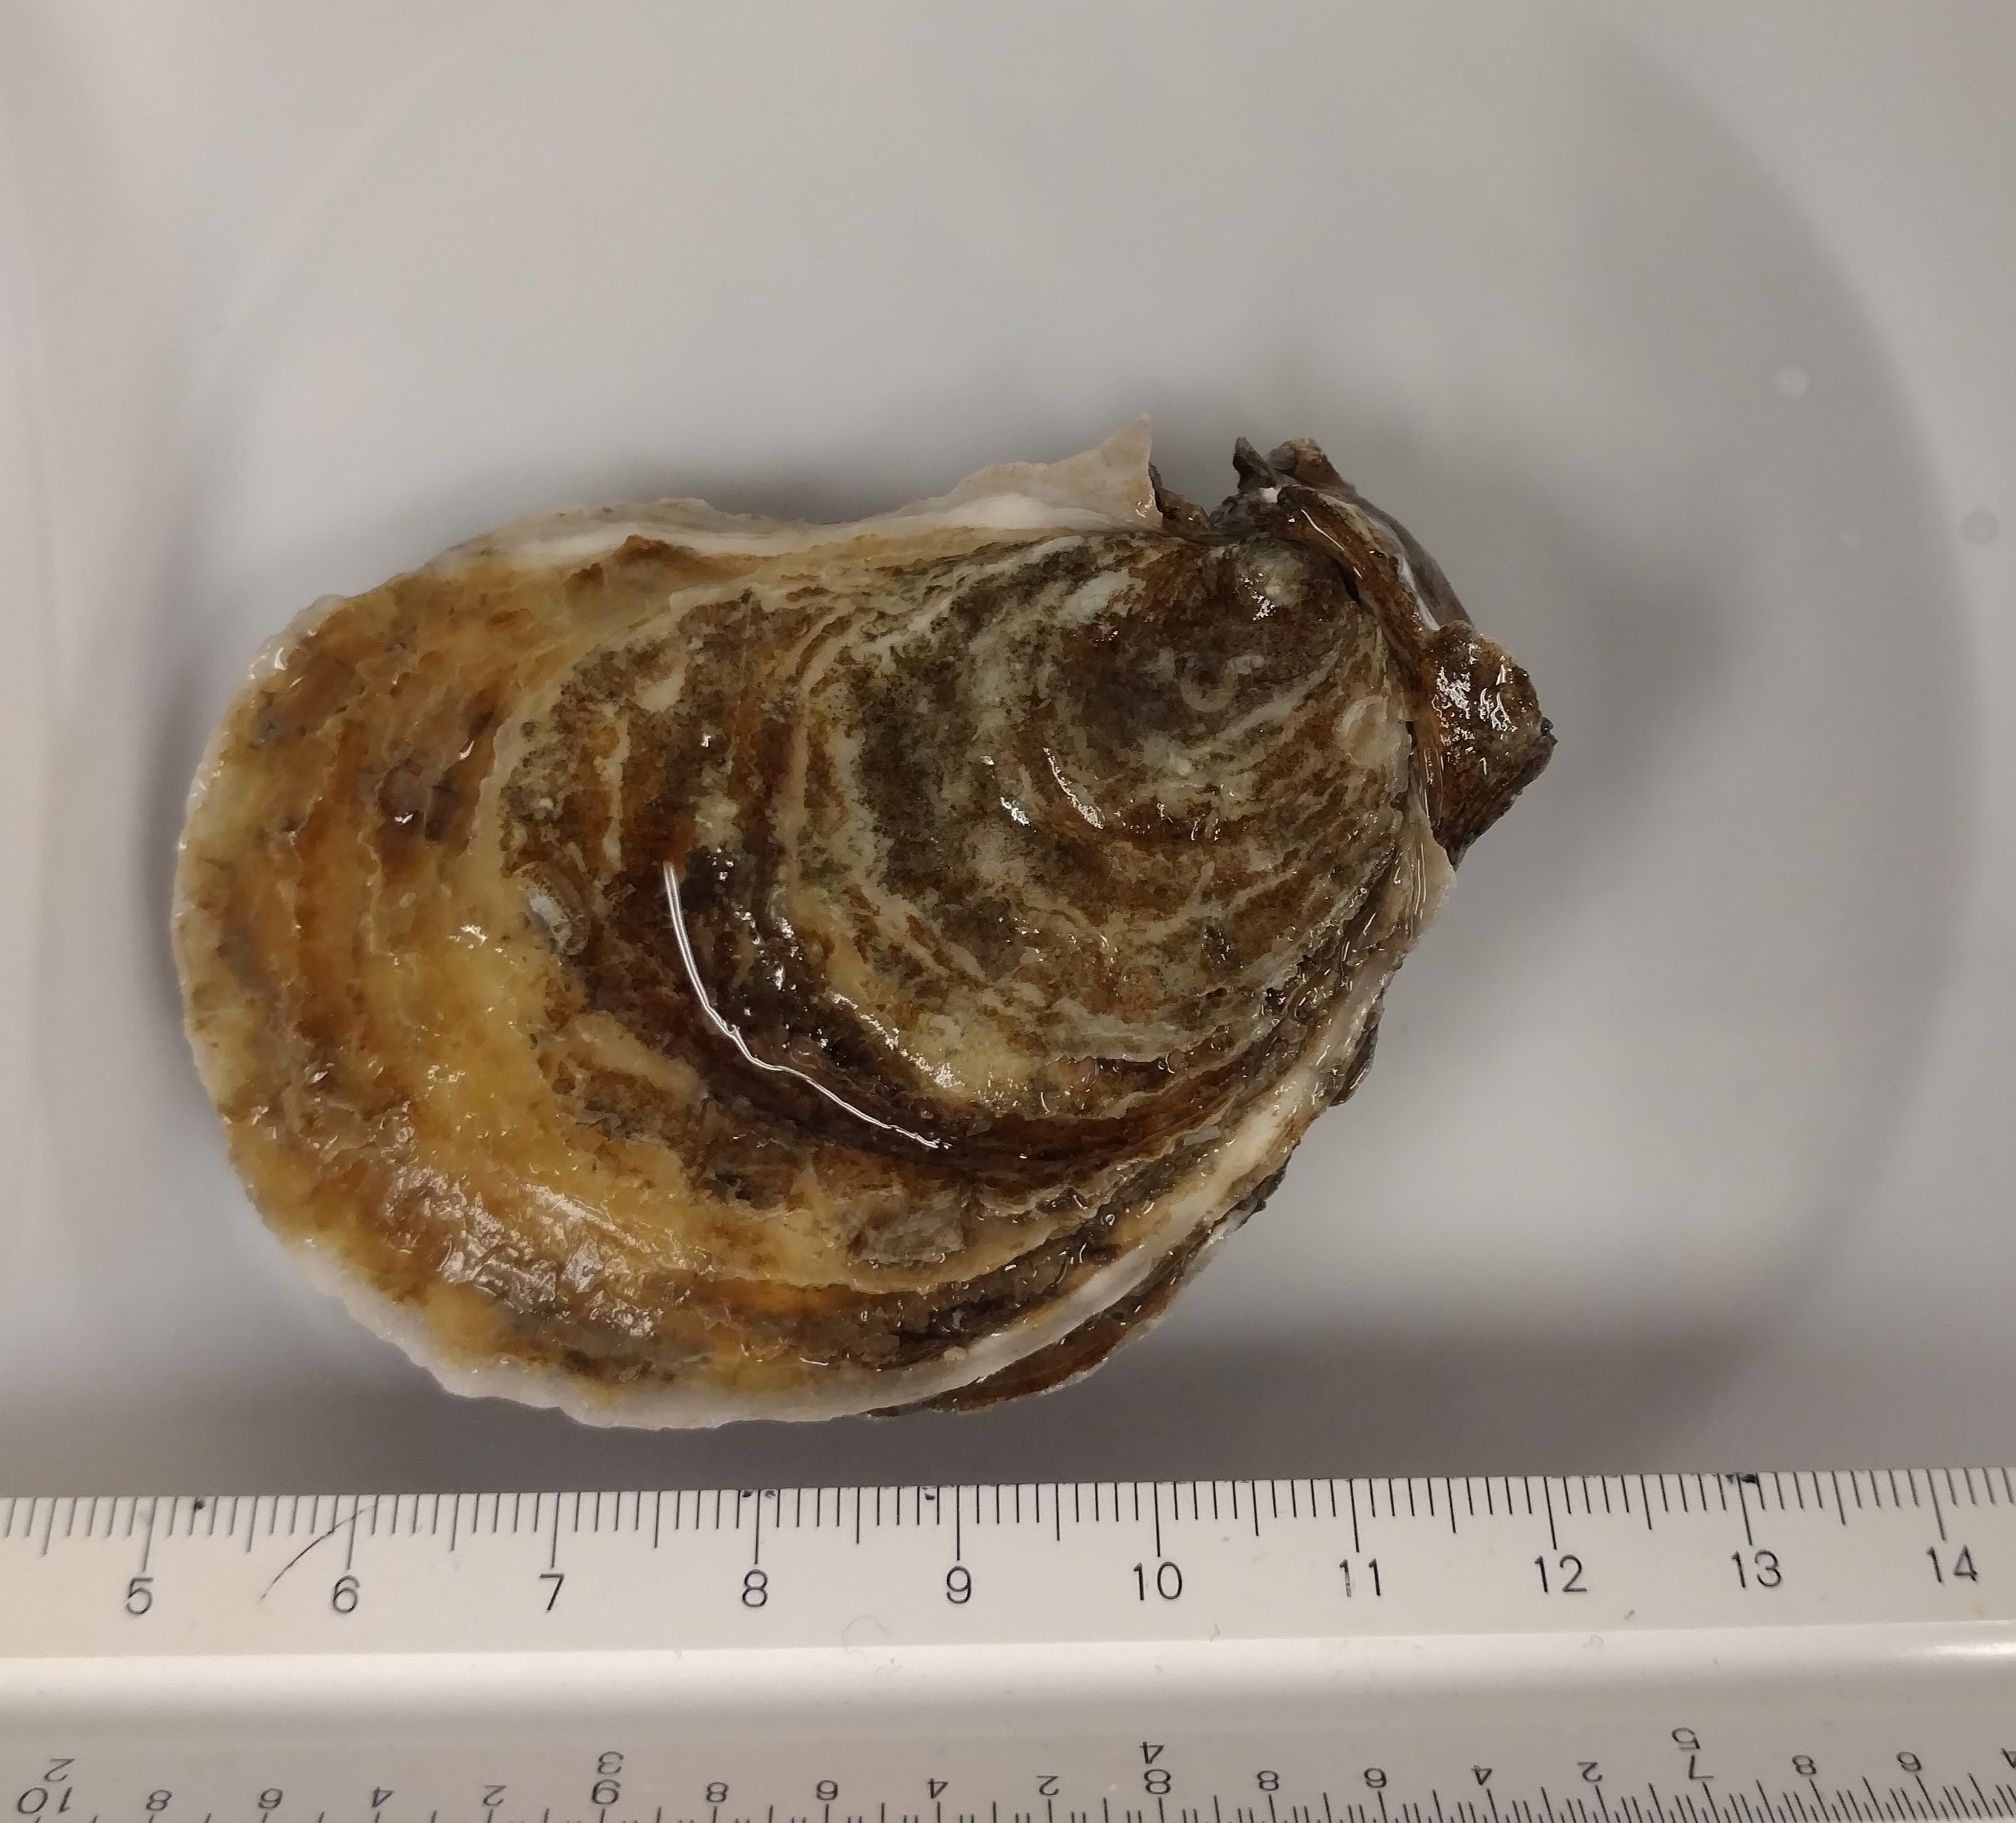
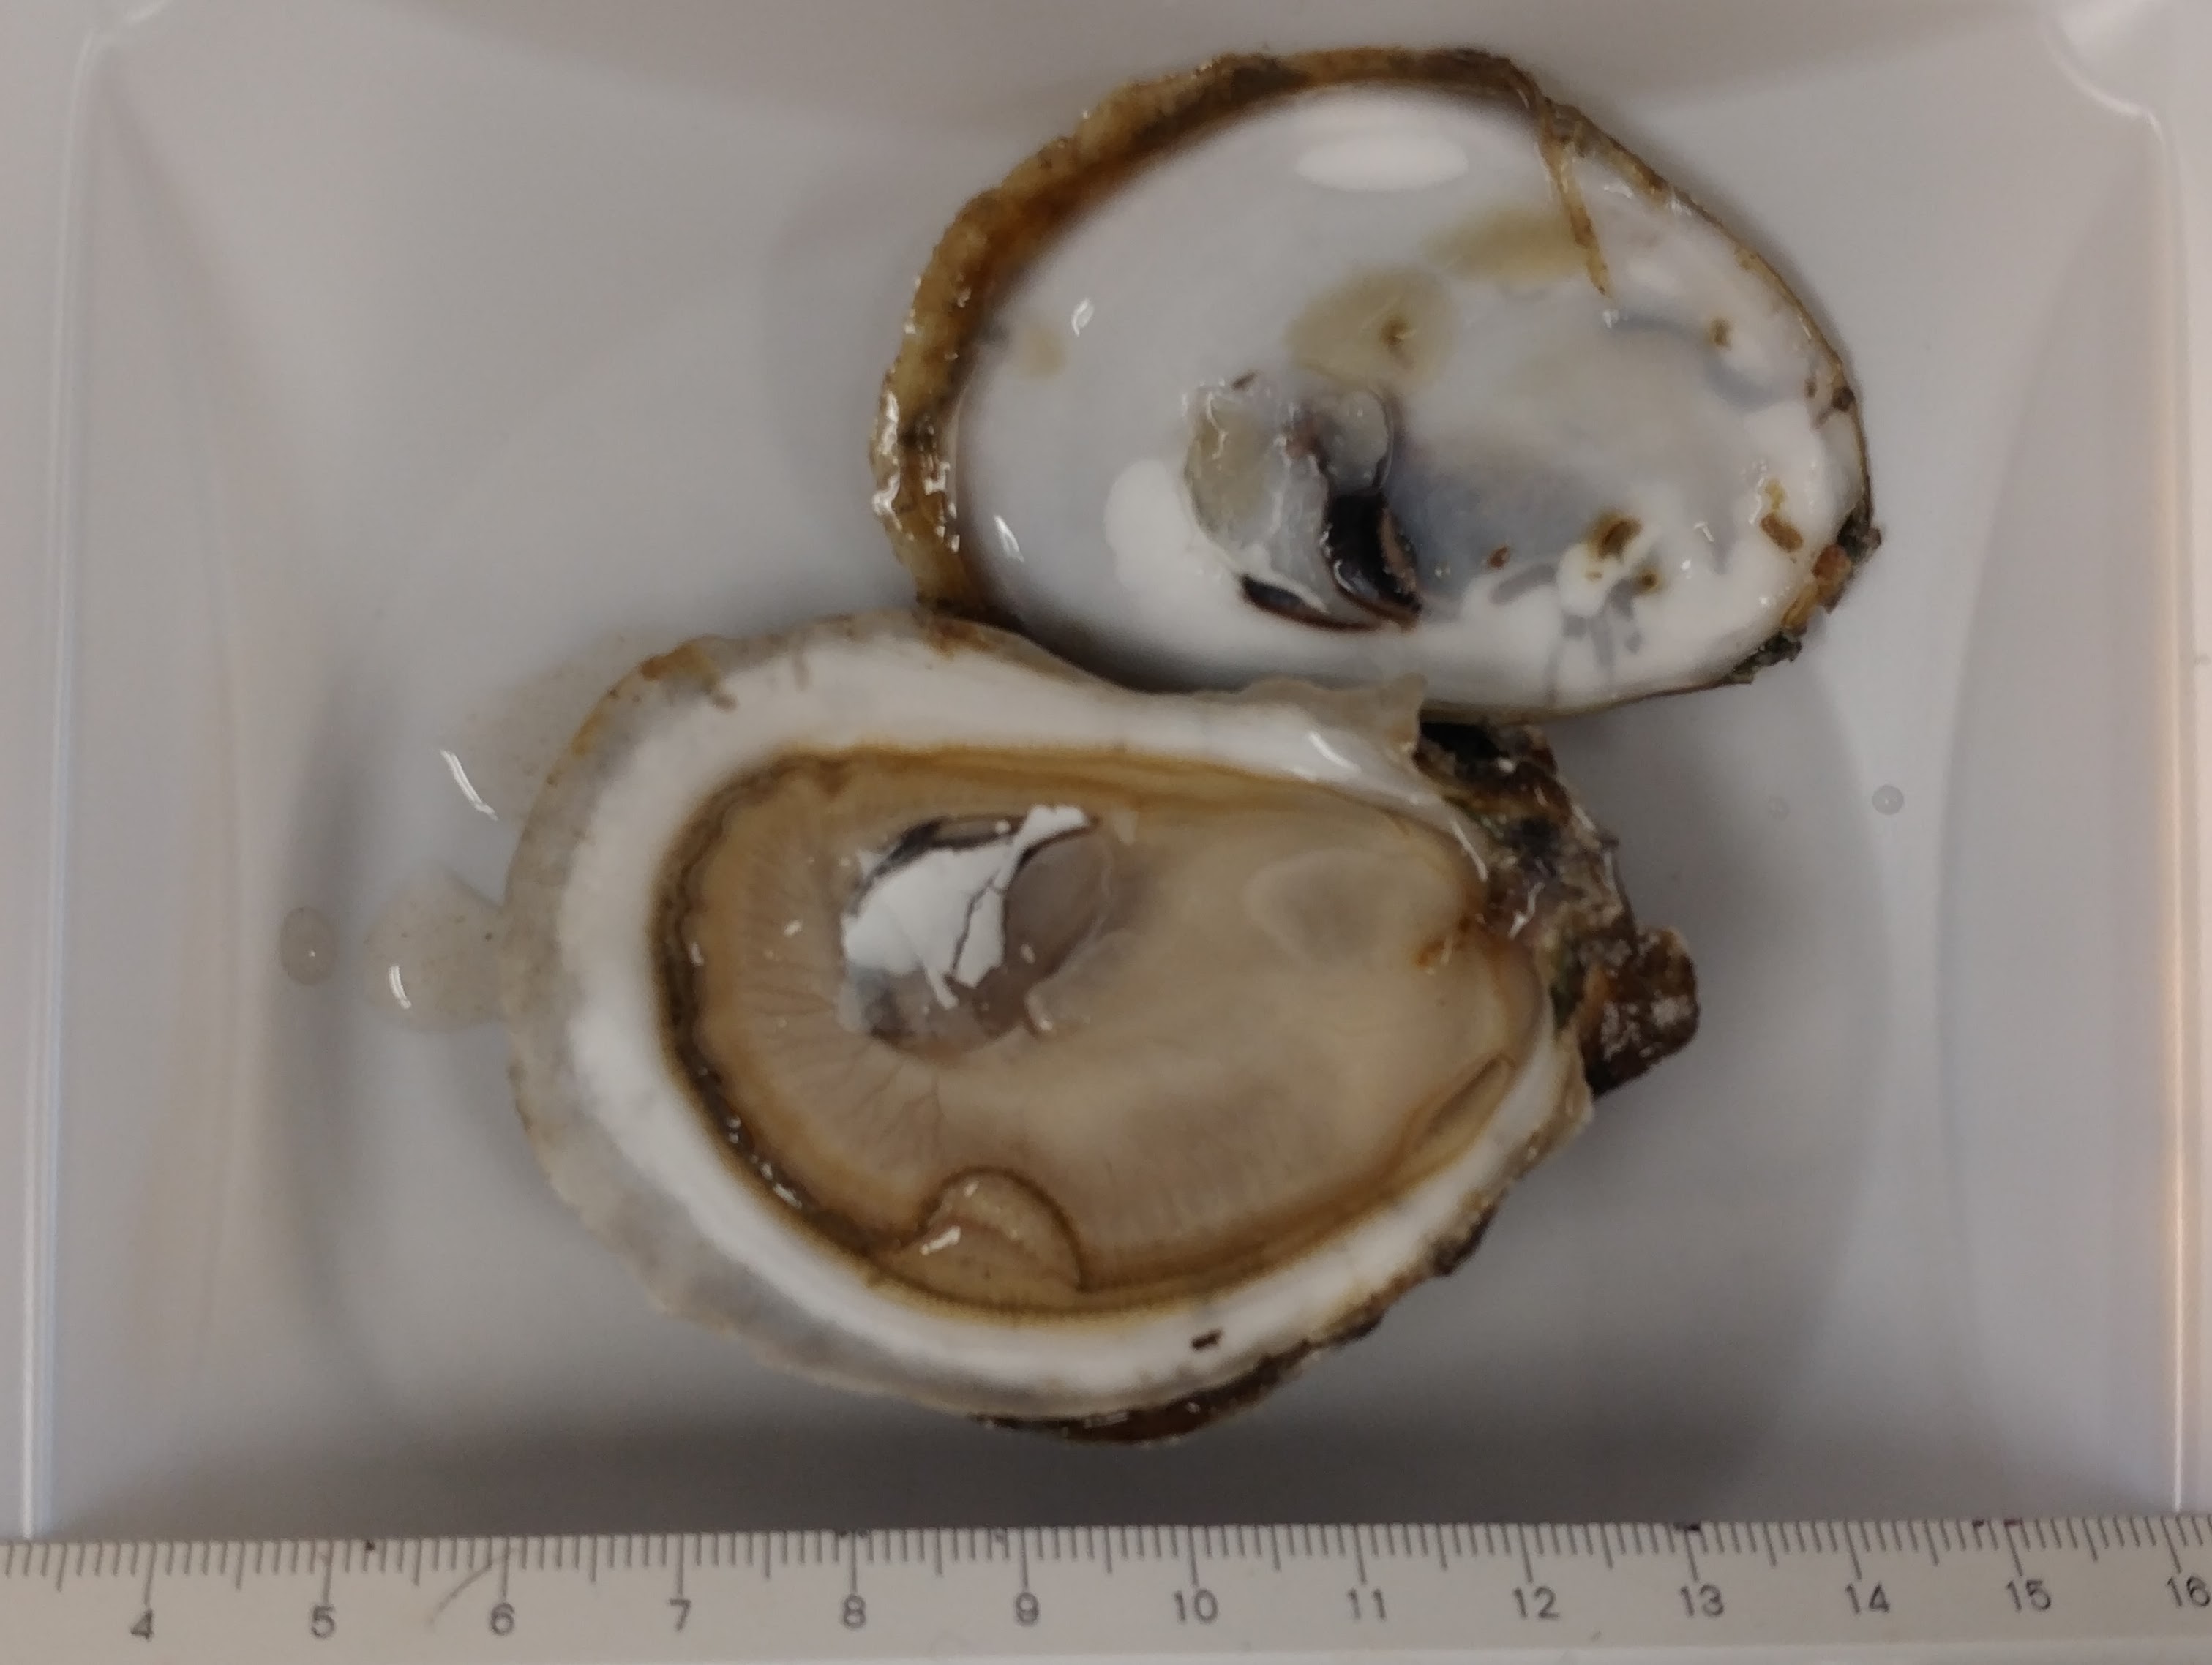
I figured it’d be prudent to collect some Eastern oyster (Crassotrea virginica) to have around the lab.

I used one of the C.virginica oysters that I picked up Taylor on 20171210 for sampling.

Sampled:

  • Upper mantle (avoided area that was near gonad/white-ish)
  • Ctenidia
  • Lower mantle
  • Muscle
  • Gonad

Samples were transferred to 1.7mL snap cap tubes, frozen on dry ice, and stored @ -80C in Rack 13, Col 1, Row 5.

Software Install – MSMTP For Email Notices of Bash Job Completion on Emu (Ubuntu)

After I finally resolved the installation of PB Jelly on Emu (running Ubuntu 16.04), I’ve had a PB Jelly assembly running for the past two weeks! I’ve gotten tired of checking on its status (i.e. is it still running?) every day, so I dove in and figured out how to set up Emu to email me when the job is complete!

To get this going, I mainly followed this msmtp ArchWiki guide., but here are the specifics of how I set it up.

Step 1. Installed a mail server:

sudo apt-get install sendmail

Step 2. Installed msmtp:

sudo apt-get install msmtp

Step 3. Created the following file in my home directory (/home/sam/): ~/.msmtprc

The original contents of the file for testing were:

       # Example for a user configuration file ~/.msmtprc
       #
       # This file focuses on TLS and authentication. Features not used here include
       # logging, timeouts, SOCKS proxies, TLS parameters, Delivery Status Notification
       # (DSN) settings, and more.

       # Set default values for all following accounts.
       defaults

       # Use the mail submission port 587 instead of the SMTP port 25.
       port 587

       # Always use STARTTLS.
       tls on
       tls_starttls on
       tls_certcheck off
       # A freemail service
       account uw

       # Host name of the SMTP server
       host smtp.washington.edu

       # Envelope-from address
       from emu@uw.edu

       # Authentication. The password is given using one of five methods, see below.
       auth on
       user samwhite

       # Password method 3: Store the password directly in this file. Usually it is not
       # a good idea to store passwords in plain text files. If you do it anyway, at
       # least make sure that this file can only be read by yourself.
       password myuwpassword

       account default : uw

This is a configuration to allow emails to get sent via the Univ. of Washington email servers. Yes, I currently had UW password saved in this file, but will be addressing this issue below.

Step 4. Changed permissions on ~/.msmtprc to be readable/writable only by me (important, particularly if you’ve stored your password in this file!):

chmod 600 ~/.msmtprc

Step 5. Assigned sendmail to use msmtp with the set command (this sets the following command as a positional parameter by adding to the /etc/mail.rc file:

echo "set sendmail=/usr/bin/msmtp" | sudo tee -a /etc/mail.rc

This command pipers the output of echo to sudo and uses tee -a to append to our desired file (/etc/mail.rc).

Step 5. Send a test email:

echo "Job complete!" | msmtp myuwemail@uw.edu

That will send an email with no subject and the body of the email will contain “Job complete!”.

That’s the basic set up for this.

To use it in your workflow, you’d append that command to the end of any Bash command or in a separate Jupyter notebook cell that is queued to run after a previous cell completes it’s job.

Example:

echo "This counts as a command"; echo "Job complete!" | msmtp myuwemail@uw.edu

This will run the first echo command. When that finishes, then the email command will run. You can get fancy and have different emails in response to how the running program exits (i.e. fails or is successful) and send different email responses, but I’m not going to get into that.

Anyway, not bad! However, we want to make this a bit nicer and more secure.


Improve security:

Step 1. Generate a GPG Key:

Follow the instructions under the Creating an Encryption Key section at this link.

DO NOT CREATE A PASSWORD! JUST HIT ENTER WHEN AT THAT STEP.

Technically, this is does not follow proper security protocols, but this is better than having a plain text password, and setting it up this way is the only way the mail program will send without prompting the user for a password (which kills the automation we’re trying to achieve).

Step 2. Create an encrypted password file:

gpg --encrypt -o ~/.msmtp-password.gpg -r youremailaddress -

After entering that, type your UW email password(NOTE: You will not receive a new prompt, so just type it in), and then Enter. Then, press Ctrl-d.

Step 3. Add the following line to your ~/.msmtprc file:

passwordeval    "gpg --quiet --for-your-eyes-only --no-tty --decrypt ~/.msmtp-password.gpg"

Here’s what the file looks like now:

       # Example for a user configuration file ~/.msmtprc
       #
       # This file focuses on TLS and authentication. Features not used here include
       # logging, timeouts, SOCKS proxies, TLS parameters, Delivery Status Notification
       # (DSN) settings, and more.

       # Set default values for all following accounts.
       defaults

       # Use the mail submission port 587 instead of the SMTP port 25.
       port 587

       # Always use STARTTLS.
       tls on
       tls_starttls on
       tls_certcheck off

       # Email account nickname
       account uw

       # Host name of the SMTP server
       host smtp.washington.edu

       # Envelope-from address
       from emu@uw.edu

       # Authentication. The password is given using one of five methods, see below.
       auth on
       user samwhite


       # Password method 2: Store the password in an encrypted file, and tell msmtp
       # which command to use to decrypt it. This is usually used with GnuPG, as in
       # this example. Usually gpg-agent will ask once for the decryption password.
       passwordeval    "gpg --quiet --for-your-eyes-only --no-tty --decrypt ~/.msmtp-password.gpg"

       account default : uw

Step 4. Change permissions on ~/.msmtp-password.gpg so it’s only readable/writable by you:

chmod 600 ~/.msmtp-password.gpg

Step 5. Send a test email like before:

echo "Job complete!" | msmtp myuwemail@uw.edu

That’s it for security.


Add a subject to the emails:

Step 1. Create ~/.default_subject.mail and add the following lines to the file (substitute your own email address):

To: myuwemail@uw.edu
From: [EMU]
Subject: JOB COMPLETE!

Feel free to change the Subject and/or From info to whatever you’d like.

Step 2. Send message using ~/.default_subject.mail:

cat ~/.default_subject.mail | msmtp myuwemail@uw.edu

To use this in your workflow, you’ll do just like before (but using the command immediately above) and append to the end of any Bash command.


Make it short & sweet

Appending those lines is going to be difficult to remember, is annoying to type out, and displays your email address (particularly if using a publicly hosted Jupyter notebook like most of us in lab do). Here’s a nice way to remedy that.

Step 1. Add email address as variable in ~/.bashrc:

Add the following lines to the end of your ~/.bashrc file:

# Email address
export EMAIL=myuwemail@uw.edu

Your email address is now saved in the variable $EMAIL. You will need to use the following command to load that information:

source ~/.bashrc

Verify that it worked:

echo "$EMAIL"

That should spit out your email address and is ready to be used!

Step 2. Add alias for full mail command to ~/.bash_aliases file:

echo "alias emailme='cat ~/.default_subject.mail | msmtp "$EMAIL"'" >> ~/.bash_aliases

Verify that it worked:

source ~/.bash_aliases
emailme

So, from now on, all you have to do is append the command emailme to the end of any Bash commands and you’ll get email when the job is finished!!! You can edit Steps 1 & 2 to use a variable other than “EMAIL” and an alias other than “emailme” – use whatever you’d like.
DNA Sonication & Bioanalzyer – C. virginica gDNA for MeDIP

I transferred 8ug (136uL) of Crassotrea virginica gDNA (isolated earlier today) to two separate 1.7mL snap cap tubes for sonication/shearing.

I performed shearing at the NOAA Northwest Fisheries Science Center, using the Qsonica Q800R. Mackenzie Gavery assisted me.

Target fragment size was ~500bp.

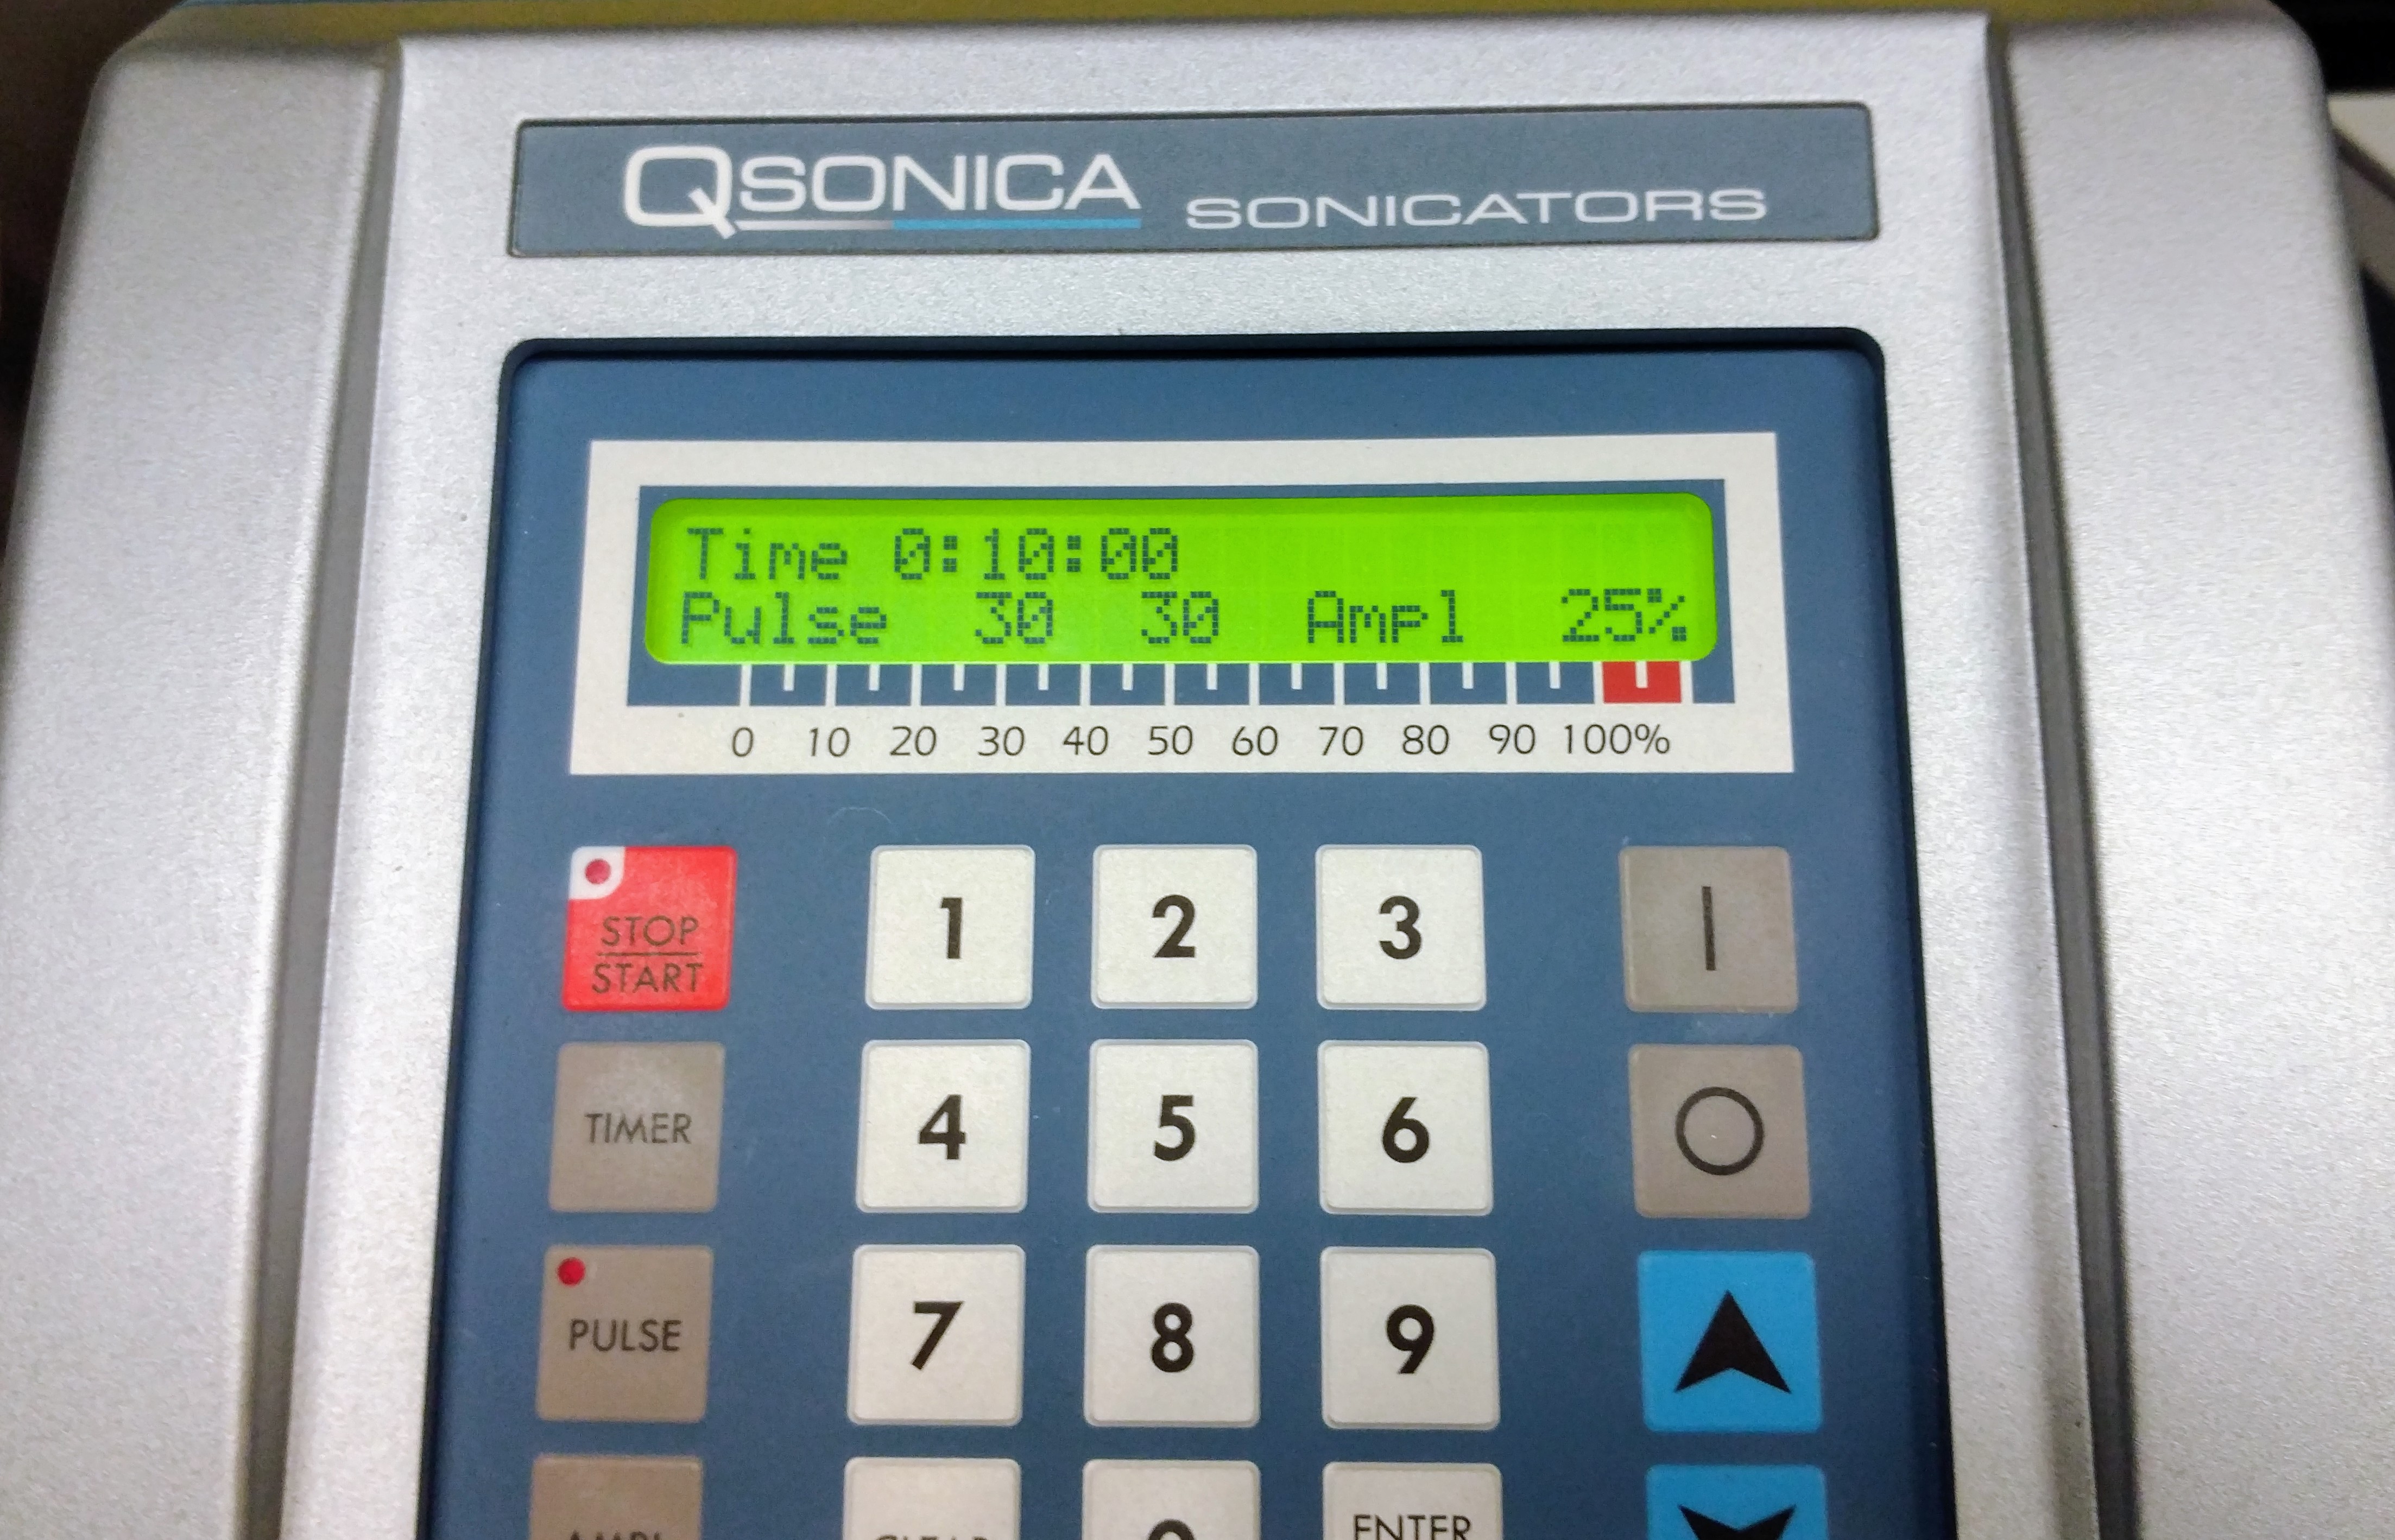
Samples were run at the same time with the following settings:

  • 10 minutes
  • 30 seconds on, 30 seconds off
  • 25% power

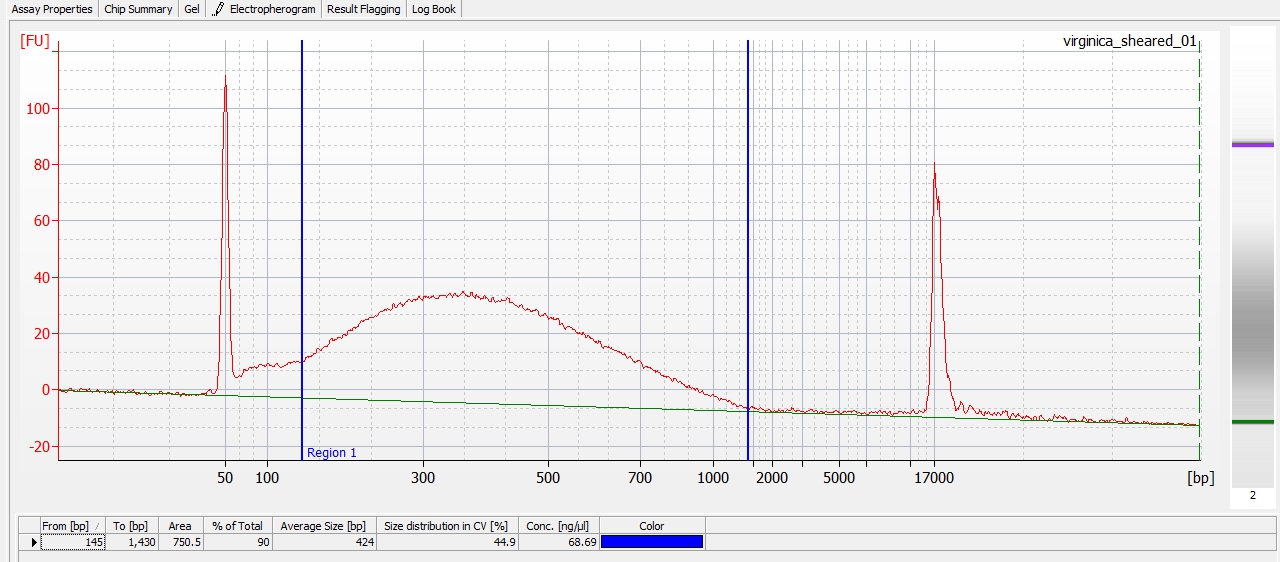
After sonication, fragmentation was assessed using the Seeb Lab’s Bioanlyzer 2100 (Agilent) and the DNA 12000 Chip Kit (Agilent). NOTE: All of the reagents and the chips were past their expiration dates (most in June 2016).

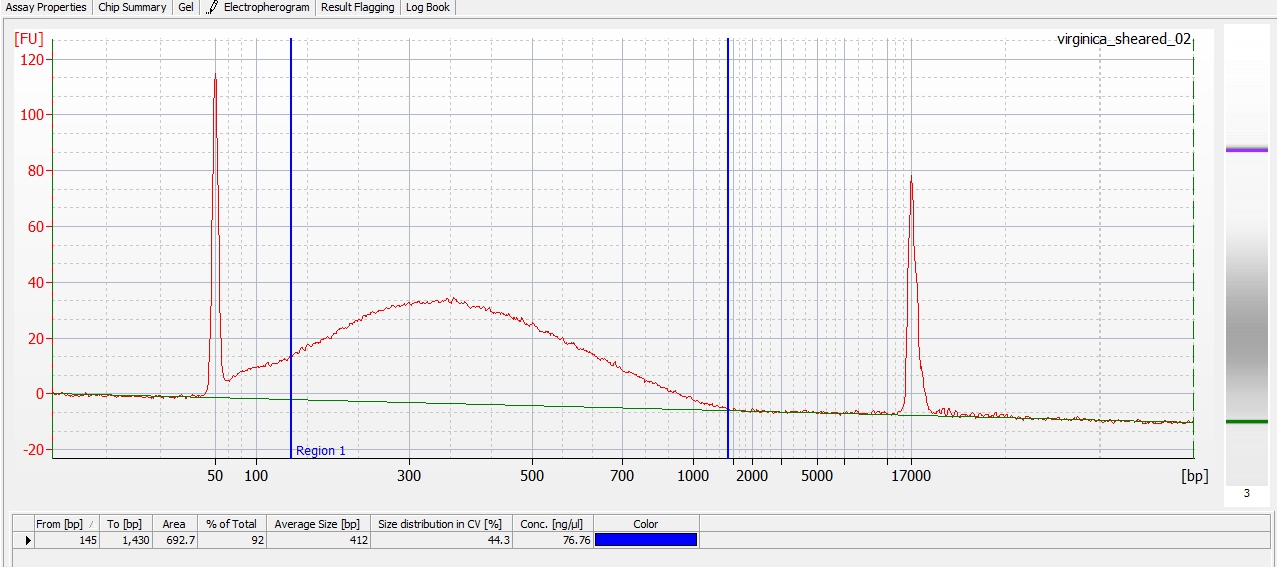
Results:

Agilent 2100 Bioanalyzer Expert file (XAD): 2100 expert_DNA 12000_DE72902486_2017-12-11_13-45-31.xad

Fragmentation was successful, and pretty consistent.

Both samples appear to have an average fragment size of ~420bp. Will proceed with MeDIP, once reagents are received.

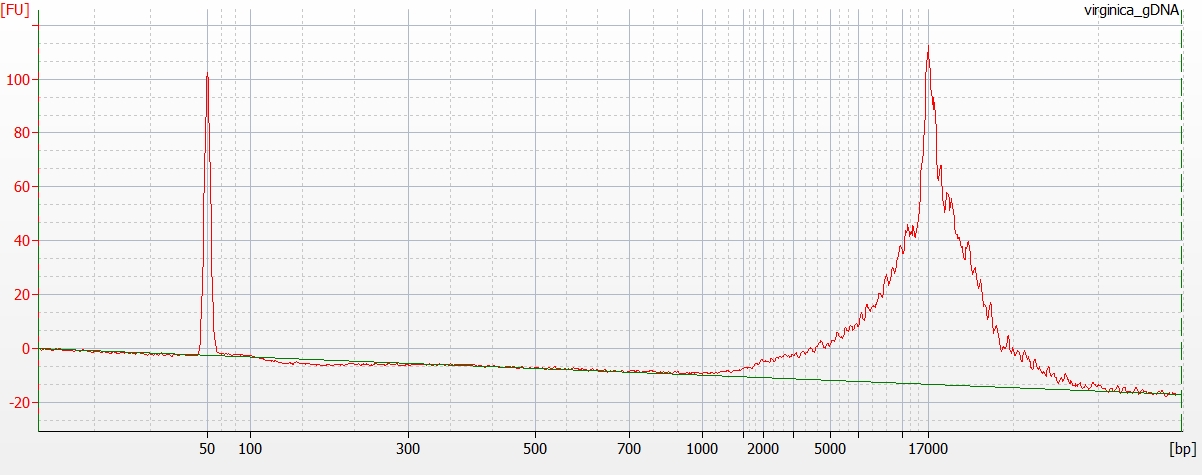
Unsheared gDNA:

DNA Isolation & Quantification – Crassostrea virginica Mantle gDNA

DNA was isolated from a single adult Eastern oyster (Crassostrea virginica) for a pilot project with Qiagen to test their new DNA bisulfite conversion kit. The oyster was obtained yesterday afternoon (20171210) from the Taylo rShellfish Pioneer Square location. The oyster was stored @ 4C O/N.

The oyster was shucked and four pieces of upper mantle tissue (~35mg each) were snap frozen in liquid nitrogen (LN2). Tissues were pulverized under LN2 and then DNA was isolated separately from each sample using the E.Z.N.A. Mollusc DNA Kit (Omega) according to the manufcaturer’s protocol.

Samples were eluted with 100uL of Elution Buffer and were pooled into a single tube.

The gDNA was quantified using the Qubit 3.0 (Invitrogen) and Qubit dsDNA Broad Range Kit (Invitrogen), using 5uL of sample.

Results:

Qubit (Google Sheet): 20171211_qubit_virginica_DNA

Concentration is 58.4ng/uL.

That makes the total yield ~23.36ug (23360ng). This is more than enough to perform two separate MeDIP preps and two separate reduced representation digestions with MspI.

Will proceed with shearing of DNA for MeDIP.

Genome Assembly – Olympia Oyster Illumina & PacBio Using PB Jelly w/BGI Scaffold Assembly

After another attempt to fix PB Jelly, I ran it again.

We’ll see how it goes this time…

Re-ran this using the BGI Illumina scaffolds FASTA.

Here’s a brief rundown of how this was run:

See the Jupyter Notebook for full details of run (see Results section below).

Results:

Output folder: http://owl.fish.washington.edu/Athaliana/20171130_oly_pbjelly/

Output FASTA file: http://owl.fish.washington.edu/Athaliana/20171130_oly_pbjelly/jelly.out.fasta

Quast assessment of output FASTA:

Assembly jelly.out
# contigs (>= 0 bp) 696946
# contigs (>= 1000 bp) 159429
# contigs (>= 5000 bp) 68750
# contigs (>= 10000 bp) 35320
# contigs (>= 25000 bp) 7048
# contigs (>= 50000 bp) 894
Total length (>= 0 bp) 1253001795
Total length (>= 1000 bp) 1140787867
Total length (>= 5000 bp) 932263178
Total length (>= 10000 bp) 691523275
Total length (>= 25000 bp) 261425921
Total length (>= 50000 bp) 57741906
# contigs 213264
Largest contig 194507
Total length 1180563613
GC (%) 36.57
N50 12433
N75 5983
L50 26241
L75 60202
# N’s per 100 kbp 6580.58

Have added this assembly to our Olympia oyster genome assemblies table.

This took an insanely long time to complete (nearly six weeks)!!! After some internet searching, I’ve found a pontential solution to this and have initiated another PB Jelly run to see if it will run faster. Regardless, it’ll be interesting to see how the results compare from two independent runs of PB Jelly.

Jupyter Notebook (GitHub): 20171130_emu_pbjelly.ipynb

Troubleshooting – PB Jelly Install on Emu Continued

The last “fix” didn’t fix everything.

This time, I received an error message that was related to blasr. Some internet searching revealed that I needed to have various library files saved to a variable named: $LD_LIBRARY_PATH

To fix this, I added the following line to the /etc/bash.bashrc file:

export "LD_LIBRARY_PATH=${LD_LIBRARY_PATH:+${LD_LIBRARY_PATH}:}/home/shared/lib:"

The line uses a fancy bash test to determine if the $LD_LIBRARY_PATH variable already exists. This is to prevent the $LD_LIBRARY_PATH from having a leading ":".

As usual, the solution to that problem was found courtesy of StackExchange (#162891).

Also, by putting this line in the /etc/bash.bashrc file, it makes the variable available for all users.

Below are some screen caps to document the process:

Realization that PB Jelly still wasn't going to work:

Identify location of file listed in error message:

Add command to /etc/bash.bashrc to set $LD_LIBRARY_PATH:

Verify $LD_LIBRARY_PATH:

Verify blasr can run: